Showing posts with label Decoration. Show all posts

Tuesday, 9 June 2015

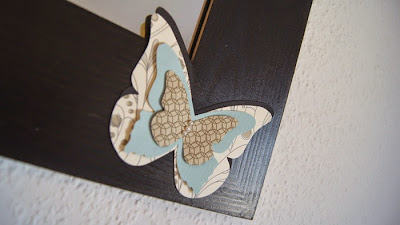
Butterflies...

Hello and welcome everybody !

Today I want to show you my Project for the new Cards und More Challenge "Gift Ideas".

I had some mirrors stored that I had bought some time ago if i ever wanted to make some deco-stuff or presents in that case and they came in handy for this challenge.
With some Papers and Pearls I turned them into Butterfly-Frames - have a look...


Can't wait to see what you come up with !

Hugs, Elisa

Monday, 1 December 2014

Memo-Board

I had this idea for a long time and today I finally finished it - 

My Cork Memo-Board

It took me forever to cut the corks in half - not even talking about how many blisters it gave me, so after weeks it found its place on the wall.

I started off with some plexiglass measuring 70x90cm, covered the whole thing with double-sided strong adhesive tape, punched 4 holes on the top part for the string to feed through and put some eyelets on them to enforce the wholes.

After that is was just putting all them corks on there - 23 rows, 8 corks or 16 pieces per row (more or less) and that equals 368 cork-halves on my Memo-Board :)

So here are the pictures...


If you make one yourself, please let me know, I'd love to see your creations!

Hugs, Elisa


Sunday, 5 October 2014

A Treasure Box with a Card...

What a long time it has been, more than 9 weeks - I'm sorry.

A lot has been going on, I'm trying to get back to my crafting routine, so today I can show you a Card I made as a request for a girl at work.

She's giving away a box filled with sand and money for a wedding and she asked me to make a Card for the inside of the box (to cover the inside of the lid).

So here is what i made...


Tuesday, 3 June 2014

Beach Wreath

G'day Ladies and Gentlemen!

Another Tuesday - another Challenge over at the CCC-Challenge and this time it's "Nautical".

I can show you the Card I made - and a collage of a wreath I made a few days back for my mom (the lighting sucks on those so I'm going to take better pics soon for you).

So here are my projects...


Hugs, Elisa


Tuesday, 20 November 2012

"Anything Goes" Challenge @ Creative Card Crew

Anything Goes at the Creative Card Crew Blog - what more do I need to say?

We're sponsored this week by ...


A friend of mine had her birthday and therefore I made a set - a picture-frame and a card ofc.

I used very suttle colors, kinda vintage it turned out and I really like it!

And now, the pics...


Hugs, Elisa

Sunday, 14 October 2012

Happy Sunday

Hello my dear Readers - this is just a quick sunday post with red velvet cake, heart candles and some quality time with my hubby =)

Hallo meine lieben Verfolger - das wird nur ein kurzer Post mit Red Velvet Kuchen, Herzchen-Kerzen und einfach den Abend mit meinem Schatz genießen =)


Hugs, Elisa

Saturday, 29 September 2012

Picture for Baby Twins


I was asked to make a "picture" for a lady who has a baby twins (boy and girl).

I used my "All in the Family" set to build the family including the two cats. As the twins are boy and girl I didn't wanted to make the picture all blue or pink - so I decided to have blue paper and newspaper print paper for the baby boy and the rosé colored ribbon for the baby girl. I punched some hearts, sponged them all the way around and adhered them with different foam pads so that I could get more depth into the pic. Finally I punched a big heart and framed that with rhinestones (I removed the heart after I got the outline done with stones) and put two little hearts inside the rhinestone-heart.

Ich wurde gebeten ein "Bild" für eine Frau zu machen, die vor kurzem Zwillinge bekommen hatte (Junge und Mädchen).
Ich habe mein "All in the Family" Set benutzt, um die Familie zu bauen, inklusive der zwei Katzen. Da die Zwillinge Junge und Mädchen sind, wollte ich nicht alles blau oder pink machen - also habe ich mich entschieden blaues Papier und Newspaper-Print-Papier für den Jungen zu nehmen und rosé farbenes Band für das Mädchen. Ein paar kleine Herzchen habe ich gestanzt, die Ränder geschwärzt und mit unterschiedlichen Foam-Pads aufgeklebt, um mehr Tiefe zu erhalten. Zum Schluss habe ich noch ein großes Herz als Vorlage für die Schmucksteine verwendet (das Herz habe ich dann wieder entfernt, nachdem ich den Umriss mit Steinen fertig hatte) und in das große Herz habe ich dann nochmals zwei kleine Herzchen geklebt.


As it's getting darker and colder everyday - I need to rethink my lightning - sorry for those bad pics :(

Challenge Entry for:

http://take-time-for-you.blogspot.co.at/ - Distress
http://oldiebutagoodiechallenge.blogspot.co.at/ - Show us your Ribbon
http://cinspirations.blogspot.co.at/ - Bingo (White, Blue, Stamps)
http://inkyimpressionschallenges.blogspot.co.at/ - Animals (Cats)
http://simonsaysstampschallenge.blogspot.co.at/ - Anything Goes
http://stampwithsarahkay.blogspot.co.at/ - Sparkling
http://just-hanna-stamps.blogspot.co.at/ - Punkte oder Streifen (Punkte - Papier, Streifen - Ribbon)
http://www.southerngirlschallenge.blogspot.co.at/ - Spots and/or Stripes (Spots - paper, Stripes - Ribbon)
http://totallypapercrafts.blogspot.co.at/ - For a Child
http://crafts4eternity.blogspot.co.at/ - When I grow up

Hugs, Elisa

Sunday, 23 September 2012

Nautical Wedding Present

Today I want to show you the present that went with the Wedding Card I showed you last time.

I got that "water jug" from a friend at work and all the rest was custommade. I glued that cord on with my hotglue-gun, added some primaflowers and pearls + rhinestones.

This jug was just the packaging of the present as bride and groom got some gift coupons which we rolled up, put into the jug and to hide them, we filled the jug half way with sand.


Heute möchte ich euch das Geschenk zeigen, das zur Hochzeitskarte vom letzten Post gehört.

Den "Wasserkrug" hab ich von einer Freundin in der Arbeit, der Rest ist "handgemacht". Die Kordel ist mit Heißkleber befestigt, dazu ein paar Primaflowers und Perlchen + Schmucksteine.

Der Krug ist allerdings nur die Verpackung des Geschenks da Braut und Bräutigam Gutscheine bekommen haben, die in Röllchen gedreht haben. Um die Gutscheine ein wenig zu verstecken wurde zu guter letzt der Krug noch zur Hälfte mit Sand gefüllt.


Hugs, Elisa


Sunday, 15 July 2012

Jewellery Boxes

A friend of mine asked me to make her two boxes for storing her jewellery...

Eine Freundin hat mich gebeten, zwei Boxen zu machen, in denen sie ihren Schmuck aufbewahren kann...


I love those papers - hard to give those away =)

Ich liebe dieses Papier - schwer, die zwei wegzugeben =)

Hugs, Elisa

Tuesday, 19 June 2012

Wedding favour box


Remember, when I showed you how to make this lil' box ? 
I made one which is for a wedding gift, so I chose to use some lace, pearls and the bride's color Purple.

Könnt ihr euch noch erinnern, wie ich euch gezeigt habe, wie man diese kleine Box macht?
Die hier habe ich für ein Hochzeitsgeschenk gemacht, also dürfen Spitze, Perlchen und die Farbe der Braut - Lila - nicht fehlen.


I hope, you're having a much more likable weather than we have here - it's melting hot -.-

Ich hoffe, ihr habt etwas angenehmeres Wetter, hier ist es zum Schmelzen heiß -.-

Hugs, Elisa

Sunday, 6 May 2012

Flowers on Sunday

Happy Sunday everyone!

I just wanted to show you the flowers I got yesterday for my bedroom.

Ich möchte euch nur kurz die Blumen zeigen, die ich gestern fürs Schlafzimmer gekauft habe.


Hugs, Elisa

Thursday, 15 March 2012

HOW TO - Covered cans for presents

Hello and Welcome everyone :) Today I have got another tutorial for you!
(I've seen this somewhere else, but I can't remember where)

Hallo und Herzlich Willkommen :) Heute habe ich eine neue Anleitung für euch!
(Ich hab das selbst irgendwo mal gesehen, aber fragt mich nicht, wo)

_________________________________________

Material:

empty/clean can - opened at the BOTTOM / eine leere/saubere Dose - am BODEN geöffnet


a strip of DSP cut down to the width/heigh of the can with strong sticky tape /
einen Streifen DSP passend zur Größe/Höhe der Dose mit starkem Klebeband


First, what you want to do is find the rebate of the can and use this for lining up your DSP for wrapping it around the can - then wrap :)
Als erstes sucht ihr euch die Falz der Dose, um daran das DSP zum Umwickeln auszurichten - dann wickeln :)


Next I searched for a nesti that covered the can's top (leave a bit of space all around the top as you need some space when opening the can - don't make it impossible to open your present box afterwards) and...
Als nächstes habe ich mir eine Nesti gesucht, die den Deckel der Dose bedeckt (etwas Platz sollte rundrum frei bleiben, da ihr ein klein wenig freien Raum beim Öffnen der Dose braucht - achtet darauf, dass es nicht unmöglich wird, eure Geschenkbox später zu öffnen) und...


find some paper that matches your DSP and cut two pieces of CS - stick those together.
sucht euch Papier, dass zum DSP passt und schneidet dann zwei Stücke aus dem CS - klebt diese zusammen.


Mark the opening thing on the circles and cut this part - then slide the CS UNDER this "ring" and stick it onto the can.
Markiert euch das Teil zum Öffnen und schneidet diesen Teil aus - dann schiebt ihr den CS UNTER diesen "Ring" und klebt ihn auf die Dose.


Last you want to fill the box and stick the bottom part back on - if you want to decorate your box - do that BEFORE closing it!
Zum Schluss müsst ihr die Dose noch füllen und den Boden wieder ankleben - wenn ihr die Box weiter dekorieren wollt, solltet ihr das machen BEVOR ihr die Box verschließt!


Now embellies - I'm using flowers I cut from matching CS and wooden butterflies that have been distressed around the edges, some ribbon, some swirls and some tiny pearls...
Nun zu den Verzierungen - Ich verwende Blumen, ausgeschnitten aus passendem CS und hölzerne Schmetterlinge, die rindrum distressed wurden, ein Bändchen, Schnörkel und ein paar kleine Perlchen...


Tadaaaa, yummieyummie :)


Challenge Entry for:
Cards und More - "Gepimpt"
Cupcake Crafts - "Going Dottie"
Take Time for You - "Frühling"
TopTipTuesday - "Crafty Buddy" (+TopTip)
Creative Inspirations - "Something for Mom"
Delightful Challenges - "For Someone Special"
Stampavie and More - "Spring"
Color Create Challenge - "#92"
Crafty Sentiments - "Things with Wings"
Raise the Bar - "4 Leaf Clover" (4 butterflies)

Why don't you try this yourself and leave a comment leading to your project?

Warum versucht ihr das nicht auch mal und lasst im Kommentar einen Link zu eurem Projekt da?

Hugs, Elisa