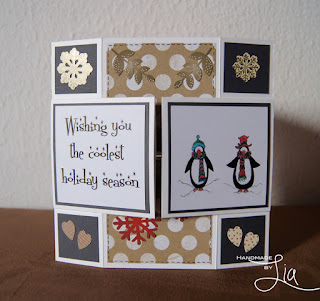
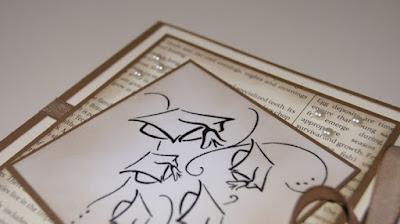
Showing posts with label SpecialCardForm. Show all posts

Friday, 11 December 2015

Be Happy and Smile

A few weeks back a friend of mine at work left to find a new job and therefore I of course had to make a Card for her.

I had not done a Shaker-Carf for such a long time to i picked the occasion to make one for her.

So here is the Card I made ...


Big hugs, Lia

Tuesday, 8 December 2015

Infinity Card for Christmas

Tuesday comes around and I have a new Challenge for you over at my Cards Und More - Challengeblog.

This week we're going for something rather unusual and a bit more time consuming -
an "Infinity Card".

I took some pics to show how all the different layers / pages look like when you spin them.


Hugs, Lia

Thursday, 5 November 2015

Cupcake Fairy

It's the 5th again and that means that over at the Stempelgarten-Blog there is a new Challenge starting today.

The theme for this time is "Anything but Square" - so I chose to make a round Card using one of my new Penny Black Stamps...


The winner of this Challenge will receive this Set worth CH 20.00


So get crafty!

Hugs, Elisa

Tuesday, 7 July 2015

Book Card

Happy Tuesday everyone!

Today I have a Card for you which I made for my Challenge-Blog Cards und More - our theme for this Challenge will is "Cards for Bookworms" anything about books: tags, book pages as design paper, or what I chose to do - a Book-Card...


It was the first time I made a Card like this and I am pretty happy how it turned out.

Sooooo, hop over to the Blog to see the team's inspirations and play along!

Hugs, Elisa

Tuesday, 12 May 2015

Spinner Card

Another Tuesday, another Challenge for you guys n dolls over at the Cards und More Blog!

Today's Challenge is to create a "Spinner Card" - I've never made one of these before but actually it wasn't that hard.
Basically what you wanna do is - add an element that rolls around in a created cut-out. In my case the Flowers can move from the left side of the Card to the right side.

So here's my project...^


I can't wait to see what you come up with and good luck to everyone who enters the Challenge!

Hugs, Elisa

Thursday, 14 March 2013

Christmas in March @ C.R.A.F.T

Hello my dear fluffy monsters =)

Today the C.R.A.F.T-Crew is having a new Challenge and this time it's "Christmas in March".

The day I was working on my Card I really had a hard time, because the sun was finally getting stronger, snow melted and the birds sang - but now, we're back to grey foggy weather -.-

But without any further blabla from me - here's my Card...


Hugs, Elisa

Tuesday, 23 October 2012

"Fancy Folds" Challenge @ Creative Card Crew

I'm getting ready for Halloween so it's another Halloween Card today even if it's "Fancy Folds" Challenge at the Creative Card Crew Challenge Blog.
I chose to make a Tent-fold-Card as I haven't ever made one before. It's a simple yet great fold that gives you a 3D look that you can use perfectly for scene-stamping.

Ich bereite mich auf Halloween vor und drum gibt's heute wieder eine Halloween Karte, obwohl die neue Challenge nach "Fancy Folds" verlangt.
Ich habe eine Zelt-Karte gebastelt, so eine hatte ich bisher noch nicht gemacht. Das ist eine relativ simple Faltung, die einen tollen 3D-Effekt zaubert, den man super für's Szenen-Stempeln verwenden kann.

We're sponsored by


So here's my card...


Hugs, Elisa


Tuesday, 31 July 2012

"Under the Sea" Challenge @ Creative Card Crew


This is our theme at Creative Card Crew, we're sponsored by...
Das ist unser Thema bei Creative Card Crew, gesponsort werden wir von...


And this is my Card


Hugs, Elisa

Saturday, 7 July 2012

Train -> Card

My stepdads got his 50th birthday upcoming and I was asked to make the Invitations.

My inspirational Pic was the following one...

Mein Stiefpaps feiert heuer seinen 50er und ich wurde gebeten, die Einladungen zu machen.

Mein Inspirationsbild war das folgende...


He really is in "love" with trains and his work is related to them, too - so he wanted some kind of reference between the card and that particular train.

Es ist eine "Liebesbeziehung", die ihn mit diesem Zug verbindet und selbst bei seiner Arbeit hat er mit Zügen zu tum - also wollte er einen Bezug zwischen den Einladungen und diesem bestimmten Zug.

First Design
___

Final Design


A very CAS look but it gets the train idea quite well (very minimalistic but nice).

Eine Karte, die total CAS ist, aber die Idee vom Zug ist doch gut getroffen (sehr minimalistisch aber dennoch).

Hugs, Elisa

Tuesday, 15 May 2012

Challenge #55 @ Cards und More

For this week's Challenge at Cards und More, lovely Dunja created a Sketch we're working with. I choose to make a non-square card - see below what I came up with.

Für die Challenge in dieser Woche bei Cards und More, hat die liebe Dunja einen Sketch gebastelt, mit dem wir arbeiten. Ich habe mich entschieden, eine "nicht-eckige" Karte zu machen, aber seht selbst, was ich gebastelt habe.


I'd love to see your creations, so get crafty and join us!

Ich würde wahnsinnig gerne eure Werke sehen, also ran an den Tisch und mitmachen!

Hugs, Elisa

Monday, 30 April 2012

HOW TO - Framed Stamping

As I was going through my stamps and nesties, I came up with something that I'd call "Framed Stamping". There might be other terms for that out there but that just popped into my mind.

This is what we are going to create - a stamped image framed by a nestabilities die that does not hit the cut edges - it fades towards the edges somehow...

Wie ich mich so durch meine Stempel und Nesties gewühlt habe, ist mir etwas eingefallen, was ich "Gerahmtes Stempeln" nennen würde. Vielleicht gibt es da draußen andere Begriffe dafür, aber das ist eben, was mir eingefallen ist.

Und das werde wir machen - ein gestempeltes Bild, eingerahmt von einer Nestebility Die, das nicht die Schnittkanten berührt, dass sozusagen, zum Rand hin verblasst...


Material:

2 Die Cuts
Post-Its
Stamp
Stamp-a-ma-jig (stamp-placing-tool) if needed/wer's verwenden will


As you can see I've chosen one beaded-circle die and a smaller circle die. You want to make sure that you use dies that don't line up exactly when punched out so they form a little "empty" space in between and this is what we're looking for.

Wie ihr sehen könnt habe ich eine Beaded-Circle Die und eine kleine Circle DIe gewählt. Egal, welche Formen ihr verwendet, wählt solche Formen, die nicht komplett aneinander grenzen - so entsteht zwischen ihnen "leerer" Raum, der wir eben erreichen wollen.


I used the smaller circle die to cut a Post-It (here I'm showing you how big my die is in reference to the image I'm going to use). The Post-it will cover up the paper so that I don't stamp outside of the circle I just cut.

Zuerst verwende ich die kleine Cirle Die, um ein Post-It in meine Schablone zu verwandeln (hier seht ihr, wie groß der Kreis im Vergleich zu dem Bild ist, das ich stempeln möchte). Das Post-It wird mir helfen, wirklich nur innerhalb des Kreises zu stempeln, den ich eben ausgestanzt habe.


Next you want to choose any CS and cut it with the Nestie you've chosen to go with the stamp. It's best to use a very light color as you will stamp directly onto that layer of CS.

Als nächstes sucht ihr euch einen CS und schneidet dann die Nestie aus, die ihr euch für euer Bild ausgesucht habt. Es ist besser, eine helle Farbe zu verwenden, da ihr ja direkt auch auf diese Lage CS stempeln werdet.


Then you'll place the Post-It (with the cut circle) right in the middle of the CS, cover the rest with Post-Its too and stamp.

Dann platziert ihr das Post-It (mit dem ausgeschnittenen Kreis) genau in der Mitte des CS, bedeckt auch den Rest mit Post-Its und stempelt.


Remove the Post-Its and TADAAAAA - you're finished! Can you see how the dress and the tuxedo fade out? I love this special look that gives!

Nehmt die Post-Its weg und TADAAAA - fertig! Seht ihr, wie das Kleid und der Anzug verblassen? Ich finde das Ergebnis einfach toll!


Come back tomorrow to see, what project I made using this cute wedding couple!

Schaut morgen wieder vorbei um zu sehen, was ich mit diesem süßen Hochzeits-Paar gemacht habe!

Hugs, Elisa

Saturday, 25 February 2012

HOW TO - Pillow-Card

Tomorrow my grandpa is celebrating his birthday so it was time to get crafty. I wanted a superclean and simple yet special card for him - that of course isn't feminin at all. Then I had an idea for a card that I've never seen before - I'm calling it a "Pillow-Card".

Morgen feiert mein Opa Geburtstag und so war es Zeit, kreativ zu werden. Ich wollte etwas ganz simple und einfaches, das trotzdem was Besonderes ist - und natürlich nicht zu feminin. Und dann hatte ich eine Idee für eine Karte, die ich so noch nie gesehen habe - ich nenne sie eine "Polster- oder Kissen-Karte".

This is a sneak of the finished card...

Das ist ein kleiner Blick auf die fertige Karte...


But I'll show you, what I mean by saying that it's a Pillow-Card - here comes the tutorial.

Aber ich will euch zeigen, wieso das eine Polster-Karte ist - hier kommt die Anleitung.
________________________________________

Material needed:

Cardbase (4 1/4 x5inches)/ Kartenbasis (11x15cm)
sticky strip / Klebeband
double-faced adhesive tape / doppelseitiges Klebeband
a thin cloth / dünnen Stoff
Vilene for volume (1/4inch)/ Volumenvlies (5mm)
any embellishments you like / jegliche Embellis, die ihr verwendet wollt
________________________________________

I started by cutting a piece of CS which is going to be the base for my pillow - so you can make it any size you want. Mine is on all four sides a little bit smaller than the cardbase (4x4 3/4inches)

Angefangen habe ich mit einem Stück CS, das später die Basis für mein Kissen sein wird - das kann man natürlich in jeder Größe machen, die man will/braucht. Meine Variante ist auf allen Seiten um ca. 5mm kleiner als die Kartenbasis (10cmx14,5cm)
________________________________________

Next I covered the pillow-base completely with double-faced adhesive tape (2inches wide) and cut a piece of Vilene that would overlap the base on all sides, removed the backig of the adhesive tape and pressed the CS firmly onto the Vilene - finally I cut the Vilene by using the pillow base as my guideline.

Als nächtes habe ich die Kissesbasis komplett mit doppelseitigem Klebeband (5cm breit) beklebt und ein Stück Volumenvlies ausgeschnitten, das die Basis an allen Seiten überlappt, dann die Folie vom Klebeband abgezogen und den CS vorsichtig auf das Vlies gedrückt - zum Schluss habe ich dann das Vlies genau an den Kanten des CS passend geschnitten.


Now you want to put you sticky strip on the other side of the CS (the one without Vilene on it) to adhere the cloth you're using. The cloth should be about an inch larger than the piece you want to cover so you've got enough material to fold over the edges.

Jetzt beklebt ihr die andere Seite (ohne Vlies) mit Klebeband, mit dem ihr den Stoff befestigen könnt, den ihr verwenden wollt. Der Stoff sollte ca 2cm größer sein als das Stück CS, das ihr bekleben wollt - so habt ihr genug Material, das ihr über die Kanten falten könnt.


I first made sure that the pillowbase is right in the center of the design of the cloth the I removed the backing of the strip and folded the corners of the cloth first and adhered them down. Here you don't want to pull the cloth at all because this would give you a messed up uneven look later. Then fold the edges of the cloth over and adhere them too.

Ich hab zuerst die Polsterbasis genau am Muster meines Stoffes ausgerichtet, dann die Folie vom Klebeband entfernt und die Ecken des Stoffes um den CS geschlagen. Versucht den Stoff hier nicht zu ziehen, das würde ein unschönes verwackeltes Ergebnis bringen. Dann faltet die langen Kanten über den CS und klebt sie auch am Klebeband fest.


My last step was to sew around the pillow once using my sewing machine - you won't be able to to that by hand as the CS plus Vilene plus cloth is just too much to push the needle through. The thread you see in the upper left - I pulled those two pieces that were showing on top of the pillow through on of the holes the sewing machine made so that I stick them onto the back of the CS by using scotch tape.

Mein letzter Schritt war einmal mit der Nähmaschine rundrum zu nähen - mit der Hand wird das nicht gehen, weil CS plus Vlies plus Stoff einfach zu dick ist um die Nadel da noch durchdrücken zu können. Die Fäden die ihr links oben seht - ich hab die beiden, die auf der Oberseite des Polsters waren, durch eines der Löcher gezogen, das die Maschine gemacht hatte. So konnte ich die dann mit normalem Tixo an der Rückseite befestigen.


This is the time to put all your embellis on, as you don't want them to show on the inner side of your card, right?

See how you get a little puff? But you'll still be able to send it in the mail as it's not too heavy at all.

Jetzt könnt ihr nach Lust und Laune dekorieren, keiner will, dass man auf der Innenseite der Karte dann  etwas durchsieht, oder?

Seht ihr, wie das Vlies der Karte einfach ein wenig Körper und Volumen gibt? Man kanns aber trotzdem noch per Post verschicken, weil es keineswegs zu schwer ist.


I added some letters just by sticking them onto the cloth by using liquid glue and two brads.

 Ich hab die Buchstaben einfach mit flüssigem Kleber auf den Stoff geklebt und zwei Brads als Gegengewicht abgebracht.


For the inside I stamped my greeting onto CS, cut that with my BigShot and layered that onto another circle of CS covered just with cloth that I also cut with the BigShot.

Innen habe ich meinen Gruß auf ein Stück CS gestempelt, das ganze durch die BigShot gedreht und auf einen zweiten Kreis (Stoff direkt auf CS, ebenfalls mit der BigShot ausgeschnitten) geklebt.


So, why don't you give it a try, it's really quick and easy! And it just adds the special something to a CAS card.

Also, versucht das doch auch mal, es geht ganz schnell und einfach! Und für eine CAS Karte bringt es einfach etwas ganz spezielles.

Hugs, Elisa

Challenge Entry for:

The Crazy Challenge - "Die or Punch"
City Crafter - It's all Natural"
TopTipTuesday - "TopTip"
Cooking it up with Katie - 3 Favorite Things (Brads, Dies, Stamps)
Kartenallerlei - "Weiß und Blau"
Paper Pretties - "Die or Punch"
The Paper Shelter - "Add a Sentiment"
Wags 'n Whiskers - "Masculin Birthday"
Willow Sketchie - "Anything Goes"
All Sorts Challenge - "Anything Goes"
Sweet Stampin Challenge - "Masculin Card"
Paper Sundaes - "Birthday"