Tuesday, 28 February 2012

Martini for Birthday

I had a request for a Birthday Card which is for a girl in her twens and as I was going through my Digis I found this one - it's so kinky I love it! The girl just looks as if she wanted to say:

"What, that's not what you meant by saying 'Take a relaxing bath'?" teheee :)

Ich hatte den Auftrag eine Geburtstagskarte für ein Mädel in den zwanzigern zu machen und wie ich so durch meine Digis geblättert habe, bin ich auf dieses gestoßen - ich finde das total cool! Die Lady sieht aus als würde sie sagen:

"Was, das hast du nicht gemeint, wie du gesagt hast 'Nimm ein entspannendes Bad'?" hihi :)


Challenge Entry for:

Tizzy Tuesday - "Allerlei Anlässe"
Top Tip Tuesday - "Stitches"

And I'm entering this card into the DT-CAll at Creative Card Crew themed "Humor".

Hope you're having a great day!

Ich wünsche euch einen schönen Tag!

Hugs, Elisa

Info - Candy Winner

Ok, so here's the deal... I haven't been contacted by be second winner either but Claudi, who was drawn as first winner wrote my an email about an hour after I've picked winner no. 2 and that's why I'll be sending the prize out to her. I hope everyone is fine with this decision as there'll be another Candy soon - I promise!

Ok, so sieht's aus... Ich bin von der zweiten Gewinnerin meines Candy's nicht kontaktiert worden aber Claudi, die ja als erste gezogen wurde, hatte mich gut eine Stunde, nachdem ich Nr. 2 ausgewählt hatte ein mail geschrieben und deswegen werde ich ihr den Preis schicken. Ich hoffe, das ist für euch alle ok weil es sicherlich bald wieder ein Candy geben wird - versprochen!

Hugs, Elisa

Monday, 27 February 2012

Baby Present

A friend of mine is about to get her baby veryvery soon and I wanted to make a little something for her...

Eine Freundin wird schon sehrsehr bald ihr Baby bekommen und ich wollte ihr etwas Kleines machen...


A little crochet-storage "basket" - I made a flat pillow that goes on the inside filles with Vilene.

Ein kleines gehäkeltes Körbchen - ich hab ein flaches Pölsterchen gefüllt mit Vlies als Innenleben gemacht.


Then there is a little box filled with pearls, I wrapped in wool to form a rattle.

Dann ist da eine kleine Box, die ich mit Perlchen gefüllt und dann in Wolle gehüllt habe, um eine Rassel zu schaffen.


Finally the "Little Monster" with a Mohawk :)

Und zum Schluss das "Kleine Monster" mit Irokesenhaarschnitt :)


I hope she'll like it!

Ich hoffe, es gefällt ihr!

Hugs, Elisa

Grampa's present

Yesterday we celebrated my gandpa's BDay and I noticed that I haven't shown you his present, yet. I got him a very special Whisky and custommade him a label that matched the Card he got.

Gestern haben wir den Geburtstag meines Großvaters gefeiert und da ist mir eingefallen, dass ich euch sein Geschenk ja gar nicht gezeigt hatte. Ich hab ihm einen besonderen Whisky besorgt und extra ein passendes Etikett zur Karte gemacht, die er bekommen hat.


Hugs, Elisa


Saturday, 25 February 2012

Another upcoming BDay

I had to use my new stamp sets I got and as I needed another BDay Card... tadaaaa

Ich musste einfach meine neuen Stempelsets verwenden und da ich eine weitere Geburtstagskarte brauchte... tadaaaa


Challenge Entry for:

Tizzy Tuesday - "Fresh Vintage"
Chaos Craft Room - "No Design Paper"

Hugs, Elisa

HOW TO - Pillow-Card

Tomorrow my grandpa is celebrating his birthday so it was time to get crafty. I wanted a superclean and simple yet special card for him - that of course isn't feminin at all. Then I had an idea for a card that I've never seen before - I'm calling it a "Pillow-Card".

Morgen feiert mein Opa Geburtstag und so war es Zeit, kreativ zu werden. Ich wollte etwas ganz simple und einfaches, das trotzdem was Besonderes ist - und natürlich nicht zu feminin. Und dann hatte ich eine Idee für eine Karte, die ich so noch nie gesehen habe - ich nenne sie eine "Polster- oder Kissen-Karte".

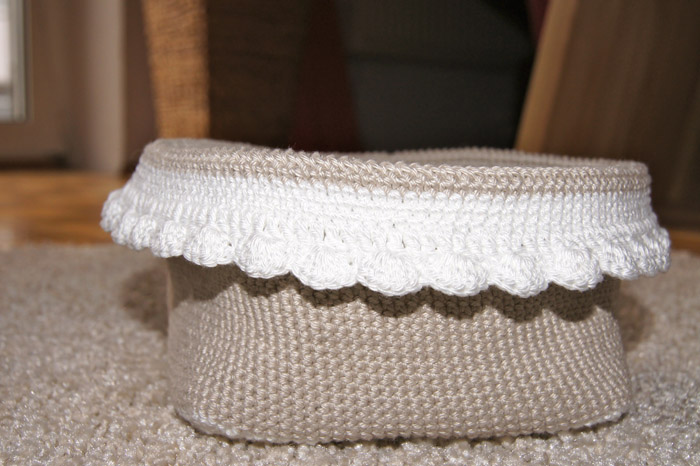
This is a sneak of the finished card...

Das ist ein kleiner Blick auf die fertige Karte...


But I'll show you, what I mean by saying that it's a Pillow-Card - here comes the tutorial.

Aber ich will euch zeigen, wieso das eine Polster-Karte ist - hier kommt die Anleitung.
________________________________________

Material needed:

Cardbase (4 1/4 x5inches)/ Kartenbasis (11x15cm)
sticky strip / Klebeband
double-faced adhesive tape / doppelseitiges Klebeband
a thin cloth / dünnen Stoff
Vilene for volume (1/4inch)/ Volumenvlies (5mm)
any embellishments you like / jegliche Embellis, die ihr verwendet wollt
________________________________________

I started by cutting a piece of CS which is going to be the base for my pillow - so you can make it any size you want. Mine is on all four sides a little bit smaller than the cardbase (4x4 3/4inches)

Angefangen habe ich mit einem Stück CS, das später die Basis für mein Kissen sein wird - das kann man natürlich in jeder Größe machen, die man will/braucht. Meine Variante ist auf allen Seiten um ca. 5mm kleiner als die Kartenbasis (10cmx14,5cm)
________________________________________

Next I covered the pillow-base completely with double-faced adhesive tape (2inches wide) and cut a piece of Vilene that would overlap the base on all sides, removed the backig of the adhesive tape and pressed the CS firmly onto the Vilene - finally I cut the Vilene by using the pillow base as my guideline.

Als nächtes habe ich die Kissesbasis komplett mit doppelseitigem Klebeband (5cm breit) beklebt und ein Stück Volumenvlies ausgeschnitten, das die Basis an allen Seiten überlappt, dann die Folie vom Klebeband abgezogen und den CS vorsichtig auf das Vlies gedrückt - zum Schluss habe ich dann das Vlies genau an den Kanten des CS passend geschnitten.


Now you want to put you sticky strip on the other side of the CS (the one without Vilene on it) to adhere the cloth you're using. The cloth should be about an inch larger than the piece you want to cover so you've got enough material to fold over the edges.

Jetzt beklebt ihr die andere Seite (ohne Vlies) mit Klebeband, mit dem ihr den Stoff befestigen könnt, den ihr verwenden wollt. Der Stoff sollte ca 2cm größer sein als das Stück CS, das ihr bekleben wollt - so habt ihr genug Material, das ihr über die Kanten falten könnt.


I first made sure that the pillowbase is right in the center of the design of the cloth the I removed the backing of the strip and folded the corners of the cloth first and adhered them down. Here you don't want to pull the cloth at all because this would give you a messed up uneven look later. Then fold the edges of the cloth over and adhere them too.

Ich hab zuerst die Polsterbasis genau am Muster meines Stoffes ausgerichtet, dann die Folie vom Klebeband entfernt und die Ecken des Stoffes um den CS geschlagen. Versucht den Stoff hier nicht zu ziehen, das würde ein unschönes verwackeltes Ergebnis bringen. Dann faltet die langen Kanten über den CS und klebt sie auch am Klebeband fest.


My last step was to sew around the pillow once using my sewing machine - you won't be able to to that by hand as the CS plus Vilene plus cloth is just too much to push the needle through. The thread you see in the upper left - I pulled those two pieces that were showing on top of the pillow through on of the holes the sewing machine made so that I stick them onto the back of the CS by using scotch tape.

Mein letzter Schritt war einmal mit der Nähmaschine rundrum zu nähen - mit der Hand wird das nicht gehen, weil CS plus Vlies plus Stoff einfach zu dick ist um die Nadel da noch durchdrücken zu können. Die Fäden die ihr links oben seht - ich hab die beiden, die auf der Oberseite des Polsters waren, durch eines der Löcher gezogen, das die Maschine gemacht hatte. So konnte ich die dann mit normalem Tixo an der Rückseite befestigen.


This is the time to put all your embellis on, as you don't want them to show on the inner side of your card, right?

See how you get a little puff? But you'll still be able to send it in the mail as it's not too heavy at all.

Jetzt könnt ihr nach Lust und Laune dekorieren, keiner will, dass man auf der Innenseite der Karte dann  etwas durchsieht, oder?

Seht ihr, wie das Vlies der Karte einfach ein wenig Körper und Volumen gibt? Man kanns aber trotzdem noch per Post verschicken, weil es keineswegs zu schwer ist.


I added some letters just by sticking them onto the cloth by using liquid glue and two brads.

 Ich hab die Buchstaben einfach mit flüssigem Kleber auf den Stoff geklebt und zwei Brads als Gegengewicht abgebracht.


For the inside I stamped my greeting onto CS, cut that with my BigShot and layered that onto another circle of CS covered just with cloth that I also cut with the BigShot.

Innen habe ich meinen Gruß auf ein Stück CS gestempelt, das ganze durch die BigShot gedreht und auf einen zweiten Kreis (Stoff direkt auf CS, ebenfalls mit der BigShot ausgeschnitten) geklebt.


So, why don't you give it a try, it's really quick and easy! And it just adds the special something to a CAS card.

Also, versucht das doch auch mal, es geht ganz schnell und einfach! Und für eine CAS Karte bringt es einfach etwas ganz spezielles.

Hugs, Elisa

Challenge Entry for:

The Crazy Challenge - "Die or Punch"
City Crafter - It's all Natural"
TopTipTuesday - "TopTip"
Cooking it up with Katie - 3 Favorite Things (Brads, Dies, Stamps)
Kartenallerlei - "Weiß und Blau"
Paper Pretties - "Die or Punch"
The Paper Shelter - "Add a Sentiment"
Wags 'n Whiskers - "Masculin Birthday"
Willow Sketchie - "Anything Goes"
All Sorts Challenge - "Anything Goes"
Sweet Stampin Challenge - "Masculin Card"
Paper Sundaes - "Birthday"

Tuesday, 21 February 2012

Flowers for the Wreath I made

This is my final result for this weeks spring wreath - I'll post pics as soon as I change anything, just to give inspiration on what you can do, with little money or time.

Das ist das Endergebnis für den Frühlingskranz (dieser Woche) - ich werde Bilder zeigen, sobald ich irgendetwas verändere, nur um Inspirationen zu zeigen, was man mit wenig Geld und Zeit machen kann.


Hugs, Elisa

Saturday, 18 February 2012

Welcome Spring

You might have seen my christmassy Wreath I made here. But as it's getting warmer again and spring is about to come - I decided to make another wreath that I can decorate matching for any occasion (as my christmassy one is glittery all over, that wouldn't work out at all). So today I went shopping and this is what I got...

Ihr habt ja vielleicht meinen Weihnachtskranz gesehen, den ich hier gemacht habe. Da es jetzt aber immer wärmer wird und der Frühling in den Startlöchern steht, habe ich beschlossen, einen neuen Kranz zu machen, der passend zu allen Anlässen dekoriert werden kann (meine Weihnachtsversion glitzert ja und das würde sich nicht so gut machen). Also, heute gings zum Einkaufen und das habe ich mit nach Hause genommen...


I got 10 ampullas, that will be filled with water for holding flowers. I had to customise them so I could attach them to the wreath.

Ich hab 10 Phiolen gekauft, die ich später noch mit Wasser und Blumen bestücken werde. Ich musste sie zuerst so herrichten, dass ich sie leicht an den Kranz anbringen konnte.


After fiddling my fingers between all those branches I finally got them place.

Nachdem ich meine Finger durch die Äste gefuzelt habe, waren dann alle am richtigen Platz.


For now I added some feltet wool ribbon in green, yellow, orange, red and purple - just to get some spring colors into my home. I'll get some flowers on monday - maybe some tulips or so.

Für jetzt habe ich gefilztes Wollband verwendet in grün, gelb, orange, rot und lila - um ein wenig Frühling in die Wohnung to holen. Am Montag werde ich noch Blumen besorgen - vielleicht Tulpen oder so.


That's it folks, for today.

Das war's für heute.

Hugs, Elisa

Thursday, 16 February 2012

See what I call my own ...

Yesterday I got two packages from "Royal Air" (that sounds so posh somehow ^.^) and as I'm not crafty right now - I'm in bed with fever - I wanted to share this with you!

Gestern habe ich zwei Päckchen von der "Royal Air" bekommen (das klingt total eingebildet oder ^.^) und da ich derzeit nichts bastel - ich lieg mit Fieber flach - wollte ich das mit euch teilen!


Thanks Sarah, I love them!

Click here to visit her blog. / Klickt hier um zu ihrem Blog zu kommen.

Hugs, Elisa

Thursday, 9 February 2012

Flutterbies all over...

I made this card today for some one who is a really big inspiration for me, but I won't tell who, because the card hasn't arrived yet :) But as I'm quite busy clearing out my craft area and rearranging it, so I wanted to share it right away.

Ich hab diese Karte für jemanden gemacht, der eine wirklich große Inspiration für mich ist, aber ich verrate nicht, wer sie bekommt, weil ich weiß, dass die Karte noch auf dem Weg ist :) Da ich aber derzeit ziemlich eingespannt bin mit ausmisten und neu arrangieren meines Bastelreiches bin, wollte ich sie euch gleich zeigen.


Hugs, Elisa